

Pan-Fried Garlic Focaccia

Pan-Fried Garlic Focaccia (No Oven Needed)
Focaccia is one of those breads that feels impressive but is surprisingly easy to make. If bread baking has ever felt intimidating, this is a great place to start. This pan-fried garlic focaccia is made without an oven, without kneading, and without complicated techniques. All you need is a bowl, a pan, and a bit of time.
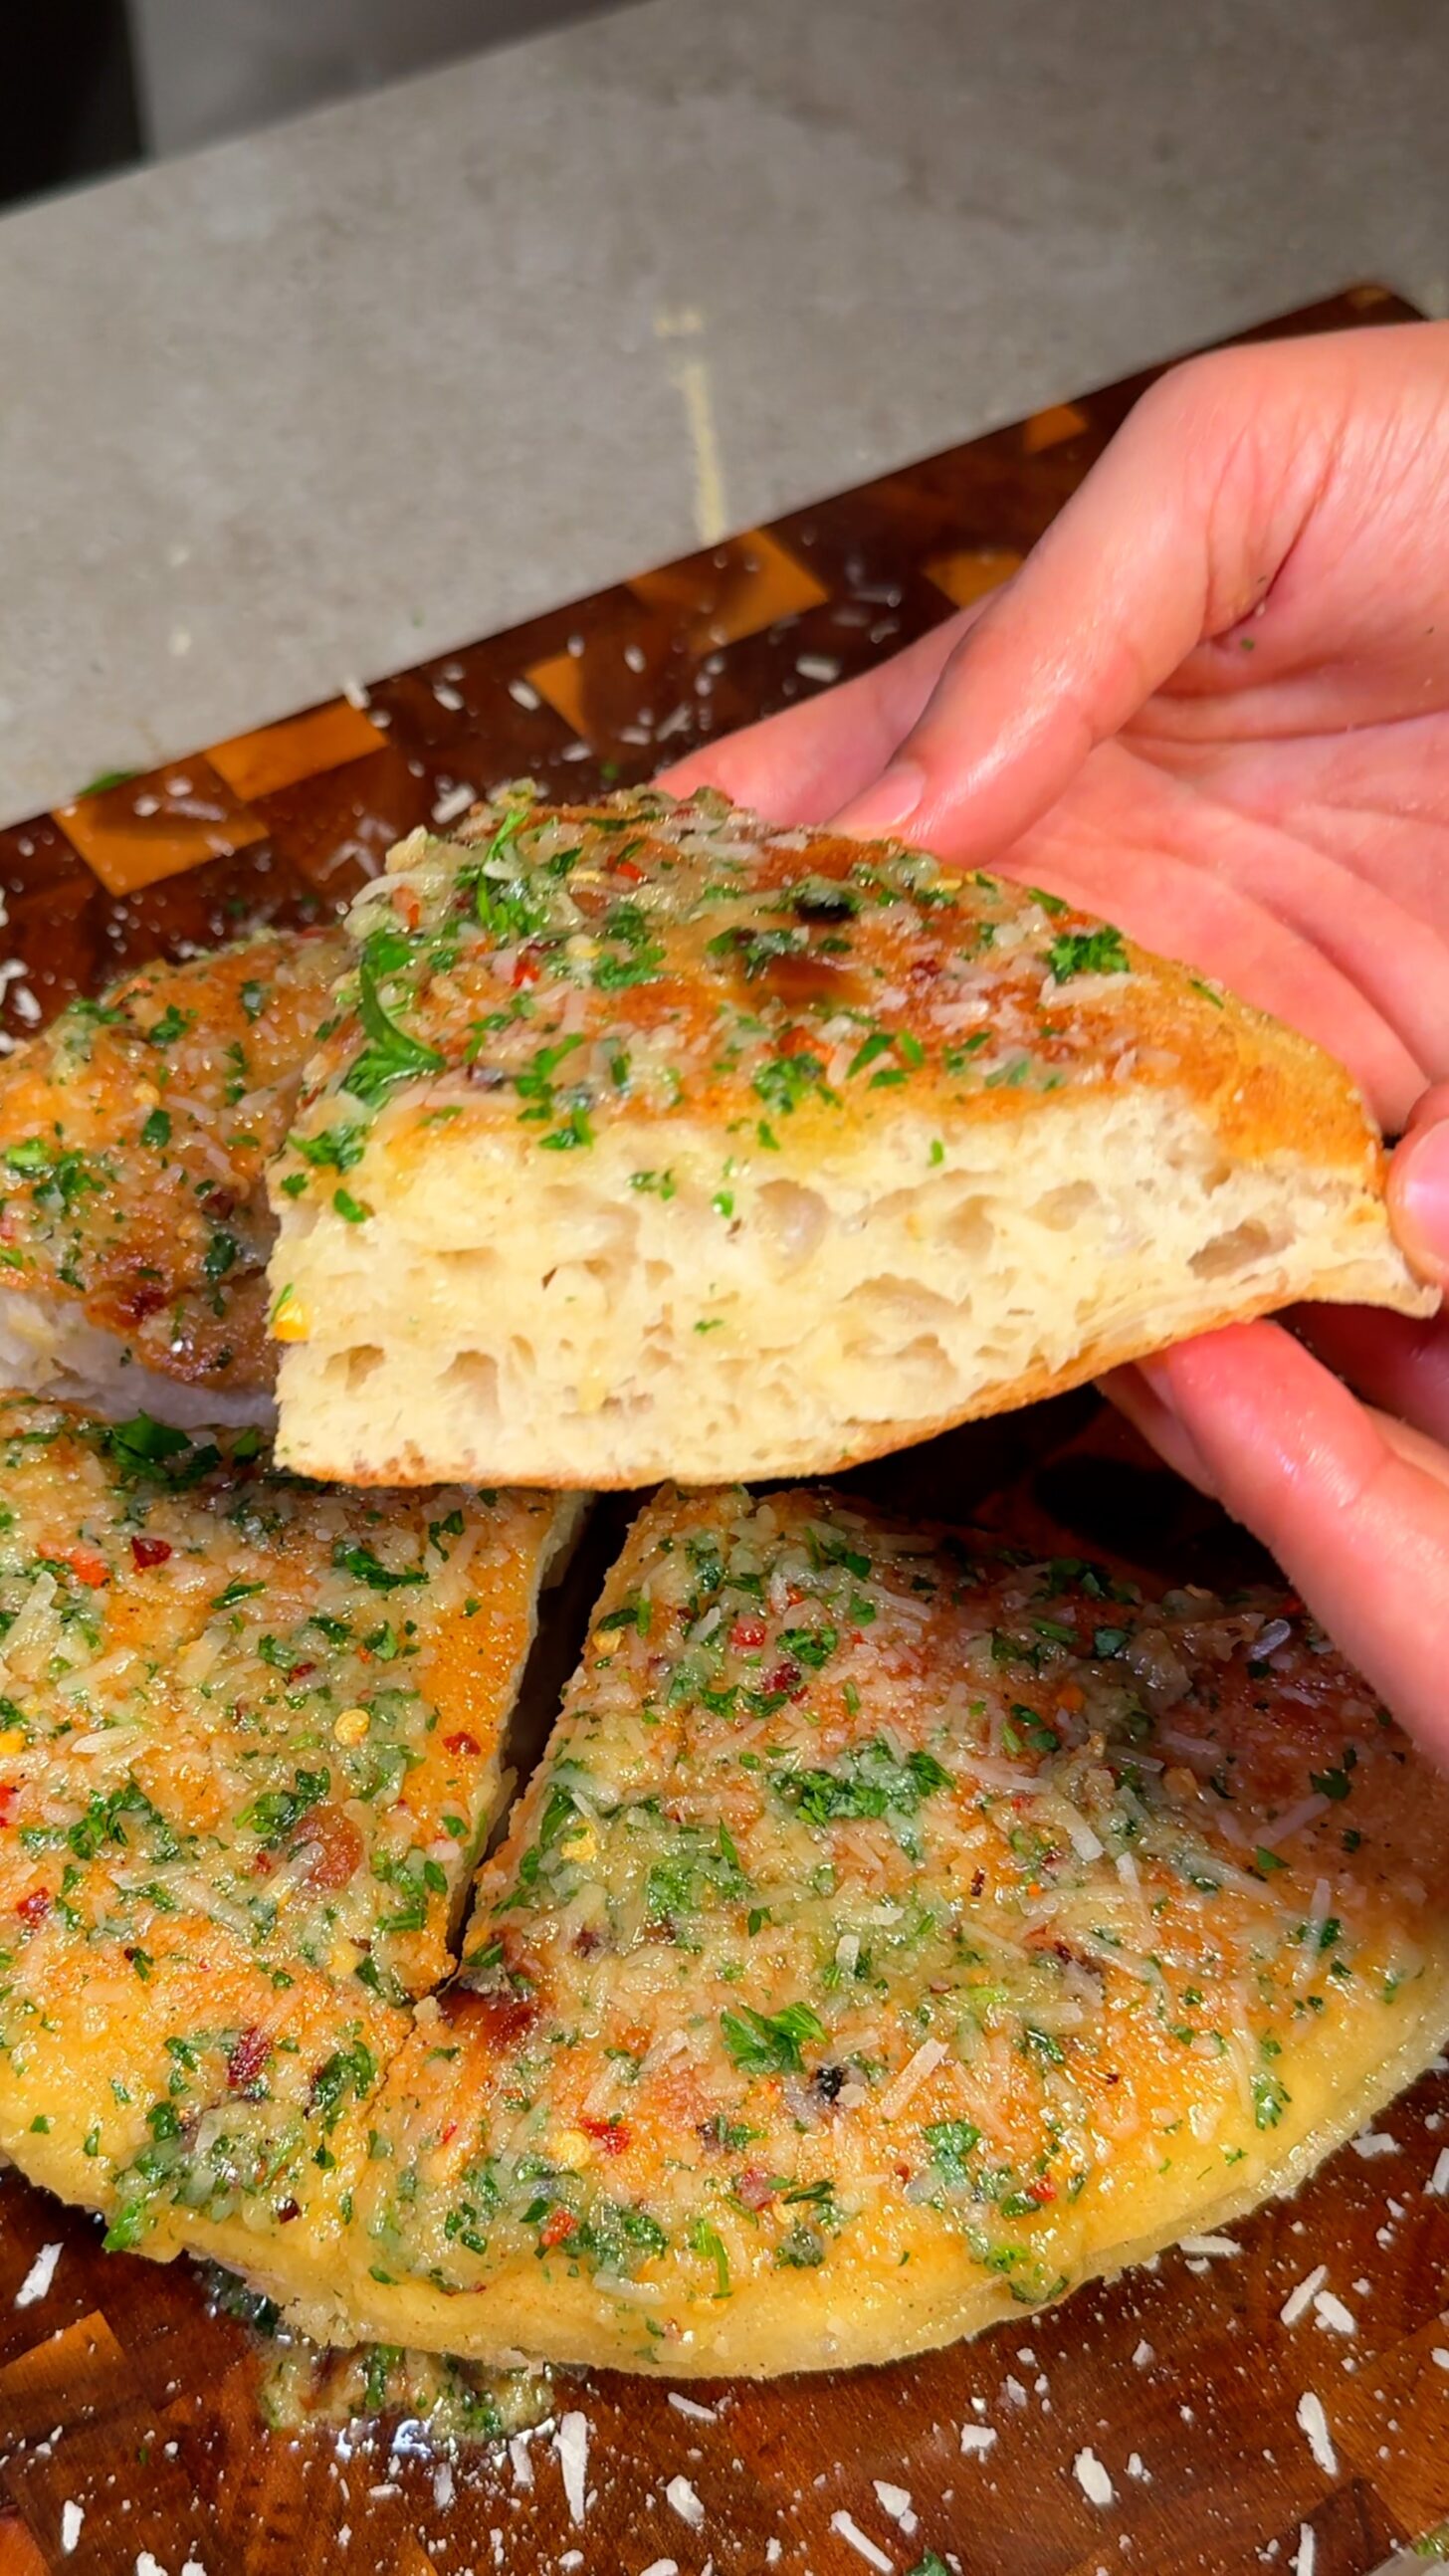
Instead of baking, this focaccia is cooked gently on the stovetop in olive oil. The result is a golden, crisp crust on the outside and a soft, airy crumb on the inside. It’s perfect if you don’t want to turn on the oven or simply want a more relaxed way to make fresh bread at home.
Why This Pan-Fried Focaccia Works
This recipe hits the sweet spot between simplicity and flavor.
The dough needs no kneading, but it does need time to rise. Plan for 8–24 hours in the fridge, or about 3–4 hours at room temperature, until doubled and bubbly. You will then divide it and gently shape two rounds with oiled hands.
Cooking focaccia in a pan has some real advantages. The olive oil gives the bottom a beautiful crispness, while covering the pan traps steam so the inside cooks through and stays fluffy. Flipping the bread halfway ensures even cooking without drying it out.
How to Make Pan-Fried Garlic Focaccia
Start with the dough: Mix the ingredients and let the dough rise until doubled and bubbly, using the full method in the card below. This is not a 15-minute bread recipe. Make the garlic topping shortly before cooking the bread so it is ready for the final brushing.
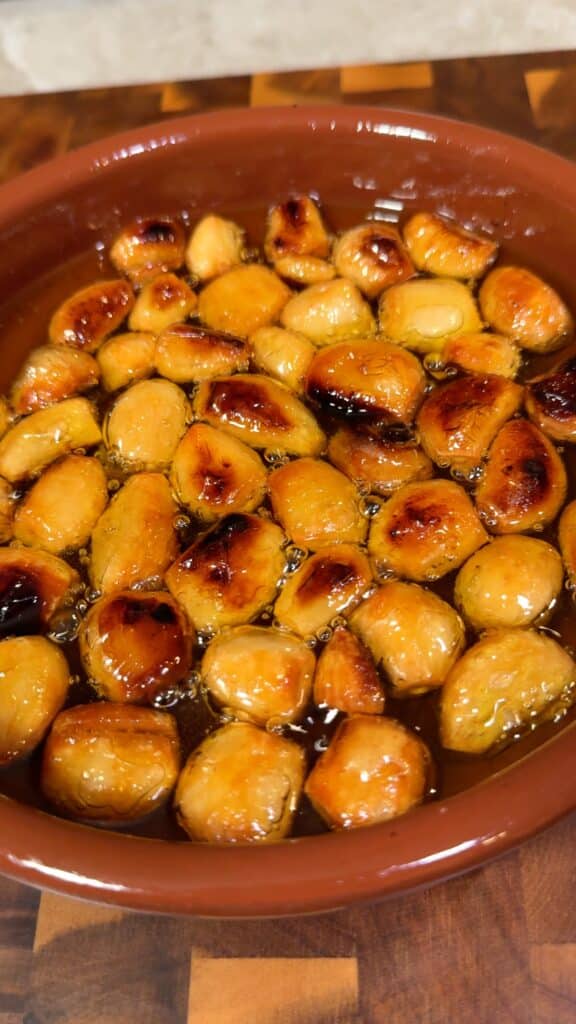
Slowly cook whole garlic cloves in olive oil until soft, golden, and fragrant.
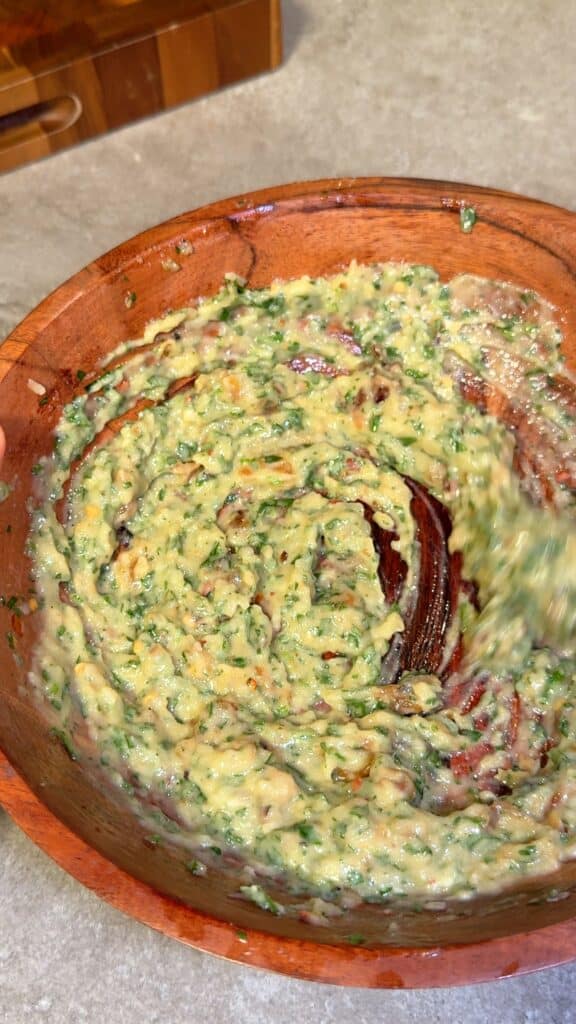
Lift the softened garlic out of the oil and mash with vegan butter, vegan parmesan, parsley and seasoning. Add only enough of the garlic oil to make it spreadable.
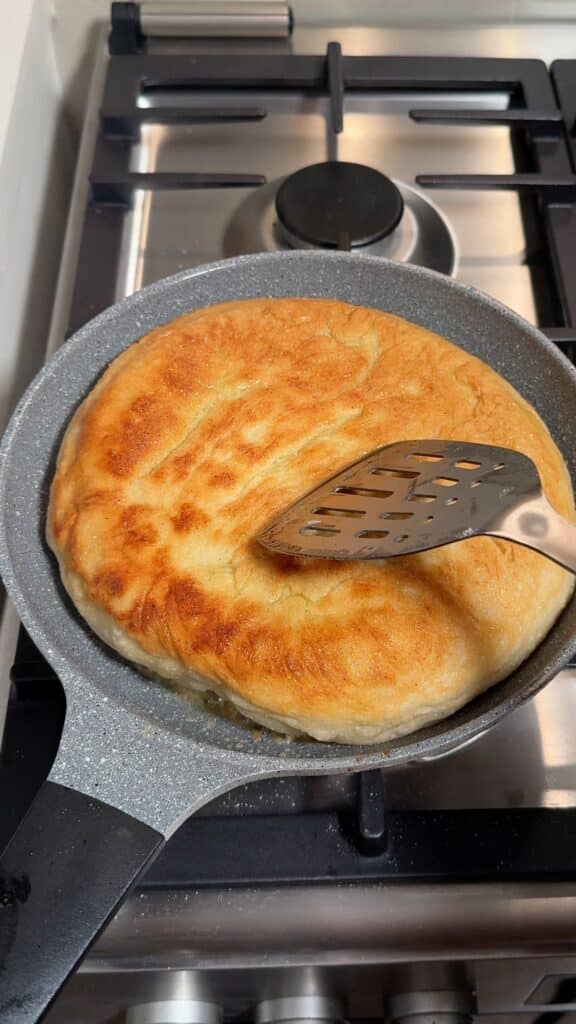
Divide the risen dough between two generously oiled pans. Cover and cook over medium-low heat, then carefully flip to cook the second side. Lower the heat if the crust browns before the center has cooked.
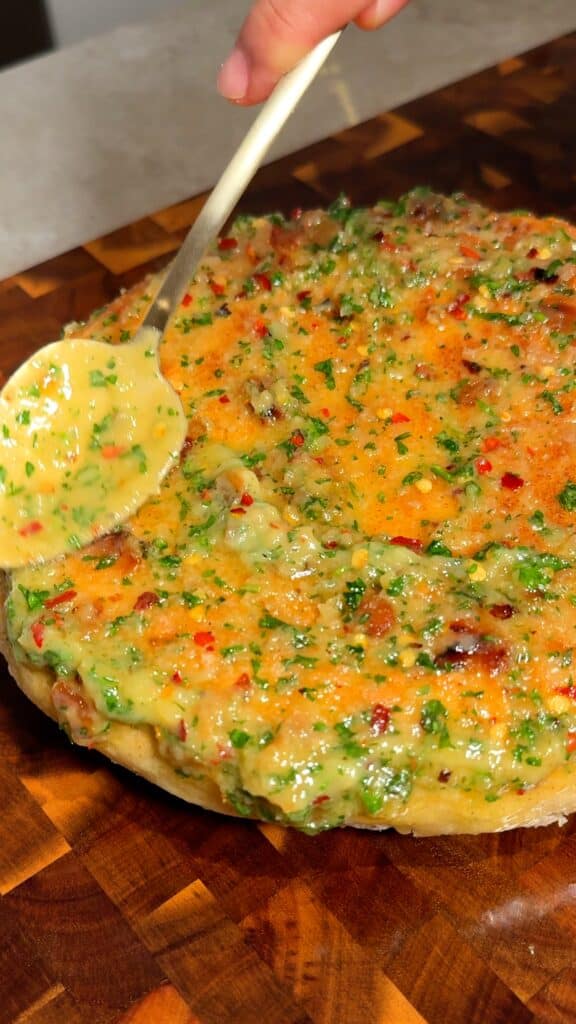
Brush the hot focaccia generously with the garlic paste, sprinkle extra vegan Parmesan on top, and serve warm.
Garlic Focaccia Done the Right Way
What really elevates this focaccia is the garlic topping.
Instead of raw or quickly fried garlic, this recipe uses garlic confit. The garlic is slowly cooked in olive oil until soft and mellow, creating deep garlic flavor without any sharp bite. The garlic is then mashed into a paste with vegan butter, herbs and vegan parmesan and brushed over the hot focaccia so it melts right into the bread.
If you love garlicky bread, you might also enjoy my cheesy garlic bread, which uses a similar flavor profile but a different technique and texture.
How to Serve (and Why You’ll Make It Again)
This pan-fried garlic focaccia is easy to serve and even easier to love. Enjoy it warm with soups or salads, slice it for sandwiches, or tear it apart straight from the pan while it’s still brushed with garlic oil. It’s also perfect for sharing.
You can keep it simple or customize it with fresh herbs, sesame seeds, flaky salt, or chili flakes. Because it’s forgiving, no-oven, and full of flavor, this is the kind of bread you’ll come back to often.
For more easy, plant-based comfort food recipes, have a look around drveganblog.com.
Keeping the garlic topping
Make the topping fresh when possible. Refrigerate leftover garlic, garlic oil and herb butter promptly in covered containers at 4°C (40°F) or below, and use within three days or freeze. Do not store homemade garlic in oil at room temperature. Refrigerate any bread already spread with the topping, too.
Pan-Fried Garlic Focaccia (No Oven Needed)
Ingredients
Method
- Mix the lukewarm water and active dry yeast in a large bowl and leave for about 5 minutes, until lightly foamy. Add the flour and salt and mix until no dry flour remains. Mix in the 4 tbsp olive oil. The dough will be soft and sticky; do not add extra flour just to make it easier to handle.
- Transfer to a lightly oiled bowl and cover. Refrigerate for 8–24 hours, until doubled and bubbly. Alternatively, let rise at room temperature for about 3–4 hours, using the same visual cue. A cool room can take longer.
- Shortly before cooking the bread, place the peeled garlic cloves and 240 ml olive oil in a small saucepan. Cook over very low heat for about 20–25 minutes, or until the cloves are soft enough to mash; larger cloves can take longer. Do not let them brown deeply. Lift the garlic out of the oil, mash and mix with the softened vegan butter, vegan parmesan, parsley, salt, pepper and optional chili flakes. Add only a little of the garlic oil, as needed, to make the topping spreadable.
- With oiled hands, divide the risen dough into two equal portions and gently shape into loose rounds without kneading. Avoid pressing out all the air.
- Heat two pans over medium-low heat and generously coat their bases with olive oil. Carefully place one dough portion in each pan and gently ease it into a round. Cover and cook for about 6–8 minutes, until golden underneath. Carefully flip with a wide spatula, add a little oil if needed, cover and cook the other side for about 5–7 minutes. These are starting estimates: lower the heat and continue cooking if the crust browns before the center is cooked. Check that the center is set, without wet or gummy dough.
- Brush the hot focaccia with the garlic butter topping. Let it settle briefly before cutting each round into four pieces, giving eight pieces in total. Serve warm.
No second rise?
The written method goes from the first rise straight to gently shaping and pan-cooking. Keep as much air in the dough as possible. If it’s cold or pulling back when shaped, let it rest covered until relaxed and a little puffy before cooking 😊
If you’re going to let it rise for a day you only need a tiny amount of yeast. When I used to make artisan bread I used an eighth of teaspoon of yeast for a half recipe which is for two loaves of bread. Look for artisan bread in 5 minutes a day website.
Thanks for sharing, Tammy! Longer fermentation can work with less yeast, but the amount depends on temperature and timing. The current recipe offers a refrigerated overnight rise or a shorter room-temperature rise, with doubled, bubbly dough as the guide.
Can you freeze this dough or keep in fridge? I live alone..
Hi Cherry! The dough can rise covered in the fridge for 8–24 hours as written, so you can divide it into smaller portions for cooking. For longer storage, I’d freeze the cooked bread in individual portions rather than give you an untested dough-freezing method. Reheat a portion when you need it, and add the garlic topping fresh 😊
How to Start a Side Hustle in 2026 https://whereatattooat.blogspot.com/
OMG! I’ve made this 3 times and the 3rd time is a charm! The crunch of the crust with the pillowy chew of the inside is a party in my mouth. Seriously worth making. It’ll replace the dinner rolls I make from scratch from now on.
That crust and soft middle are such a lovely combination, Naylene! So happy your third batch was a winner. Thanks for sharing 😊
can you make the topping ahead of time? If so, should it be heated before putting on bread? Can this dough be frozen or chilled?
Hi Cherry! Yes, the topping can be made ahead—refrigerate it promptly and use within 3 days, as the recipe notes suggest. Gently warm just the portion you need until spreadable before brushing it onto hot bread. The dough can rise covered in the fridge for 8–24 hours. For longer storage, freezing the cooked bread in portions is the simpler option; I don’t have a tested dough-freezing method for this one 😊
The nutritional amounts… is that for 1/8th of the whole loaf, or for the whole thing? If it’s for just one piece, it’s 669 calories and 61 carbs?? that’s a whole day’s worth of carbs for me. But damn this looks so good!
Hi Shar! The card’s figures are intended per piece when the two rounds are cut into 8 pieces total. They’re only estimates, though, and the oil calculation is especially uncertain because not all the garlic-cooking oil is eaten. For an accurate portion total, use the amounts of oil and topping you actually add rather than relying on that displayed figure.
I need a pan recommendation!
Hi Pati! Look for a heavy-bottomed skillet with a well-fitting lid, either non-stick or well-seasoned cast iron. The even heat and lid help the middle cook before the base gets too dark. Use medium-low heat and enough room to keep the dough from being too thick 😊
This recipe is awesome. I’ve made it 3 times, well made the bread 3 times and each time it turns out wonderful. I froze my 2nd dough and made the first half with the garlic/parsley spread, the 2nd I turned into cinnamon bread by rolling it, covering the dough with cinnamon sugar, folding it over and frying it. Oh my. I ate the whole thing. Won’t do that again. 3rd time I made it just like the recipe from dough I’d frozen again (how easy to just pull it from the freezer, let it thaw and raise a bit and then cook). This is a keeper for sure. Thanks! Tastes so good and is so versatile!
Love hearing how you’ve used the dough, Katherine! So glad your frozen portions worked well, and the cinnamon version sounds lovely. Thanks for sharing all those details 😊
Yum! Made this today for tonight’s dinner. Very nice. Used the remaining dough to make a cinnamon scroll and OMG. Winner! Rolled the dough into a long log, about 3 inches wide. Filled with a cinnamon sugar mix, then rolled into about a 1-inch roll then wound that up so it resembled a scroll. After cooking and cooling topped it with a simple glaze. The final result is delicious, has a lovely chew on the edges!.
Your cinnamon scroll sounds lovely, Caroline! So glad you enjoyed both the savory bread and your sweet variation. Thanks for sharing 😊
I just found you and love the way you cook
So glad you found your way here, Jan! Thank you for the kind words 😊
Easy and delicious!
Thank you, Anna! So glad you enjoyed it 😊
The instructions mention the ‘first rise’ but never indicates a ‘second rise’. Is this an oversight?
In spite of my confusion, I made the bread without a second rise and I have to say it was wonderful. A relatively quick and easy bread with a fantastic topping.
So glad you enjoyed it, Jeannie! The written method goes straight from the first rise to gentle shaping and pan-cooking, so there isn’t a separate second rise listed. The wording is confusing, sorry about that. If the dough is cold or resists shaping, a short covered rest until relaxed and a little puffy can help 😊